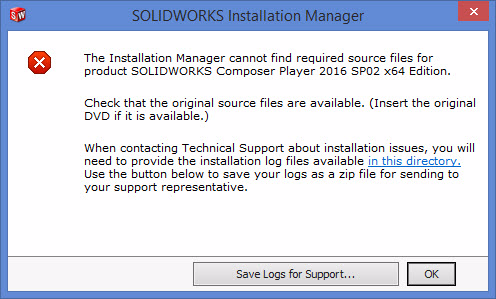
A common hurdle to a repair or update of the SOLIDWORKS application is a failure of the Installation manager to locate the source files that were used to install the application. This is displayed to the user as the following SOLIDWORKS Installation Manager pop-up box, in which the user is notified and given the option to save the logs for support and/or just click OK.
Whether the user chooses to save the logs or not, this will eventually lead to the following information being displayed by the Installation Manager, in where the Toolbox (if working with a product that includes Toolbox) is often configured, but the next items in the list are shown as unsuccessful and the remaining items are not yet attempted.
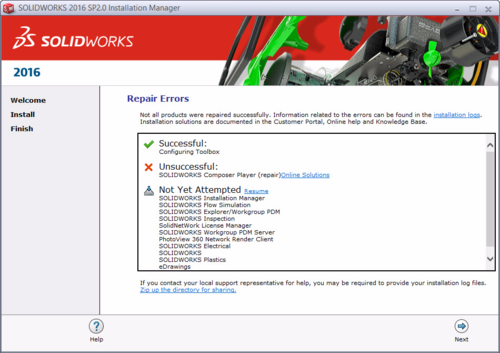
What the SOLIDWORKS installation manager is trying to tell you is that it cannot find the file required to complete the repair or update the application. SOLIDWORKS does require the original installation source files for the currently installed version and service pack to be present in order to complete a repair or update of the application.
The location of these files is directly related to where the files were located when the original installation was completed. If the application was installed directly from the SOLIDWORKS DVD, then the installation manager is looking for that DVD. Otherwise, the application may have been installed from files located directly on the workstation, a jump drive, or an accessible network drive.
Users can find the original installation file locations within the Installation Manager at the Summary screen by clicking on the Change button associated to the Download Options.
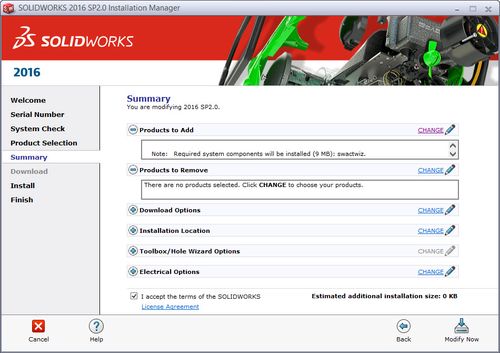
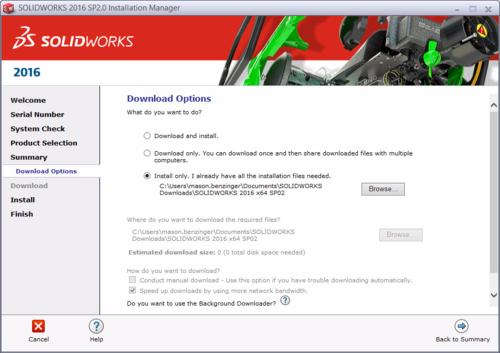
Clicking the Change button will display the information as seen below, where the user can browse to the directory listed to see if the files are present. The default location for files saved locally by the Installation Manager is in the Documents Library, in a folder called SOLIDWORKS Downloads and a subfolder named after the version and service pack. An example:
C:\Users\<user name>\Documents\SOLIDWORKS Downloads\SOLIDWORKS 2016 x64 SP02.
If the files are not present in the location specified, you have two options – locate the installation files and resolve the discrepancy between the location specified and the actual location, or download the installation files.
Common reasons the installation files are missing are:
- The application was installed directly from the DVD, which is no longer in the disc tray.
- The files were located on a Network drive and have since been removed or made inaccessible by the IT/Admin group.
- The files were located locally (default location) and were deleted, perhaps to clear up space on the hard drive.
The missing source files can be downloaded through the installation manager, from the same location by selecting the middle radio button to Download Only, and making sub-selections for a full file set or to download only what you need.
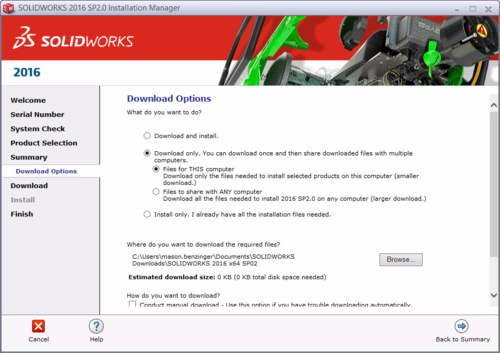
This download can take some time, especially when selecting the option to download “Files to share with ANY computer.” This will download the complete installation file set – even for features users may not have installed such as Simulation or PDM. The user will need to make appropriate allowances here for bandwidth and time to complete this task.
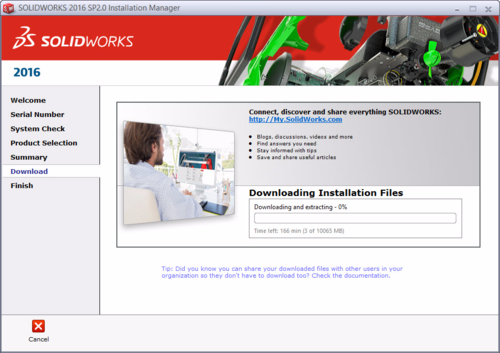
Once the files have been downloaded, the user should be able to proceed with the repair or update of the SOLIDWORKS application.
Share
Meet the Author

