Are you taking full advantage of the SOLIDWORKS Cavity Command? If you’re not, dive into this story below to learn more about the tool and how you should be using it.
Story Tutorial: Sol & Sal Drill into the Cavity Command
“Say, Sol, are you going to the dentist?” Sol’s somewhat cerebral sidekick Sal asked.
“Um, no, Sal, why do you ask?” Sol solicited.
“Well,” Sal stated, “I keep hearing you mention cavities.”
“Aha! I see! No, Sal,” Sol said, “I was talking about the Cavity command in SOLIDWORKS!”
“The Cavity command in SOLIDWORKS, Sol?”
Sol speculated that Sal was not up to speed with the Cavity command in SOLIDWORKS, and suggested a scenario. “Have you ever had to create a relief on a part in an assembly, based on the shape of a neighboring part?”
“All the time, Sol!” shrieked Sal. “Remember, you showed me, I use the Insert Part command to insert and position a derived part as a body into another part file, and then I use the Combine command with the Subtract option to create that body’s shape in my part. It’s a bit laborious, but it works.”
Sol smiled serenely at his student. “Yes, Sal, now let me show you another way.”
“Certainly!” Sal shrieked.
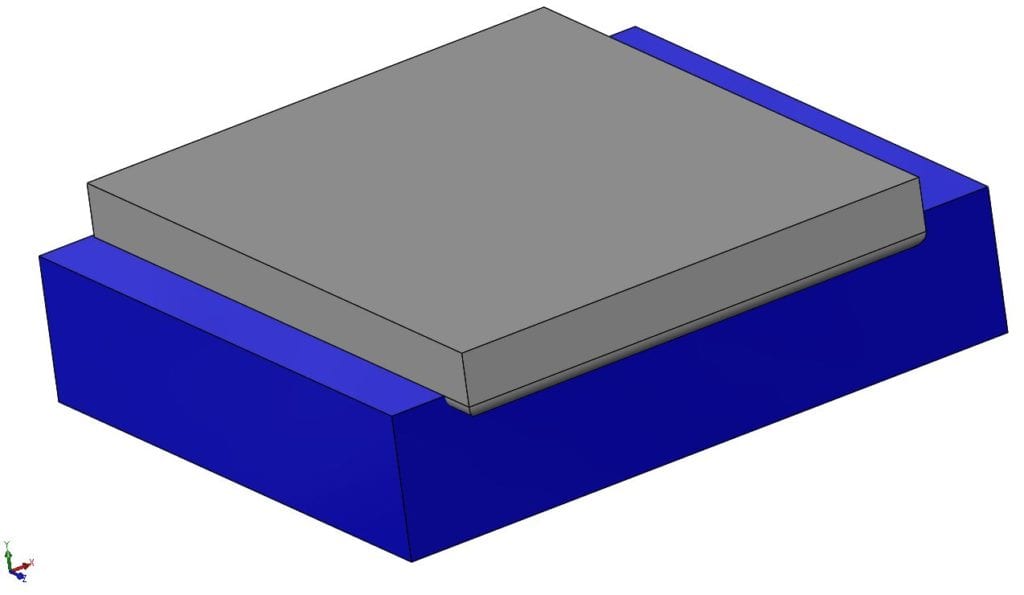
“Here’s a real simple example I worked up for you. I start off by editing this lower part.”
“Where, Sol?”
“In Figure 1, Sal.”
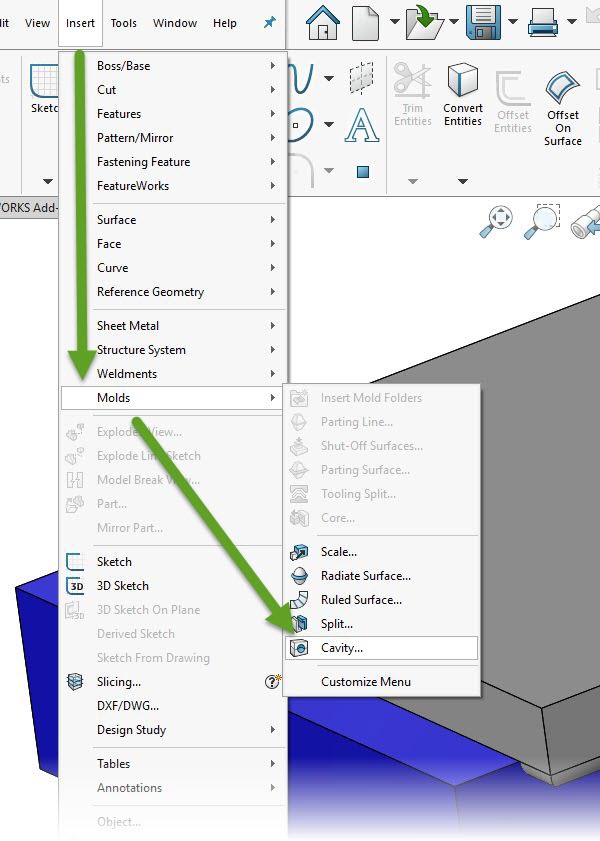
“And then, I pick Insert, then Molds, then Cavity…”
“Like in Figure 2, Sol?”
“Yes, Sal, and then I pick the upper part as my Design Component….”
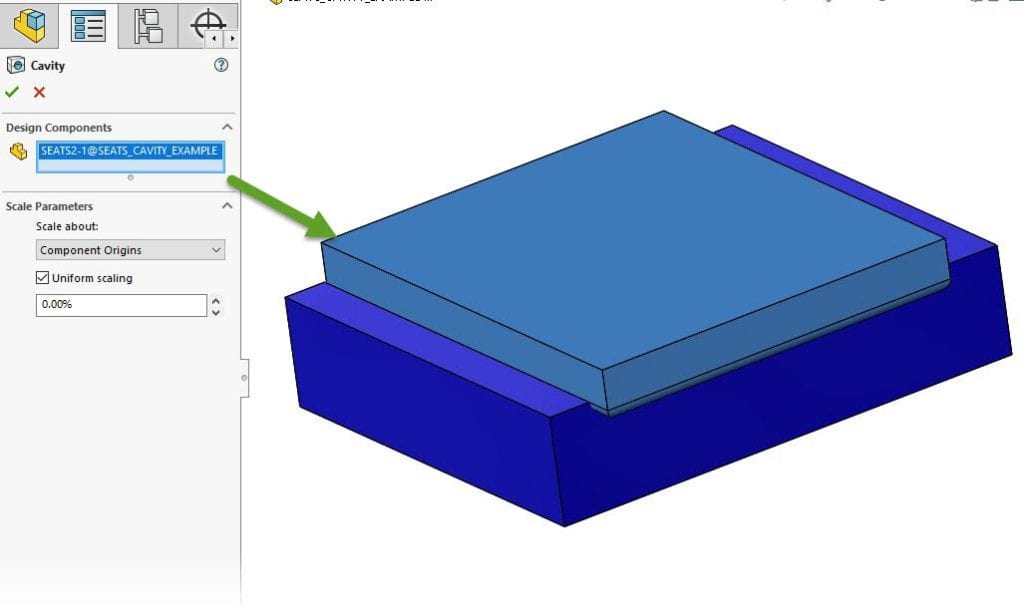
“…and as you can see, once I finish editing the part, and hiding the part I used as the ‘Design Component,’ I have my cavity!”
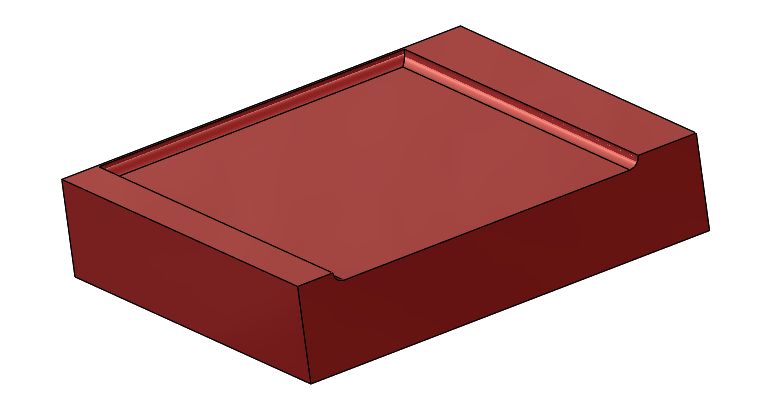
“Wow, Sol, where do you learn all these cool techniques?”
“Why, from the excellent blog at gsc-3d.com, Sal!”
Share
Meet the Author

