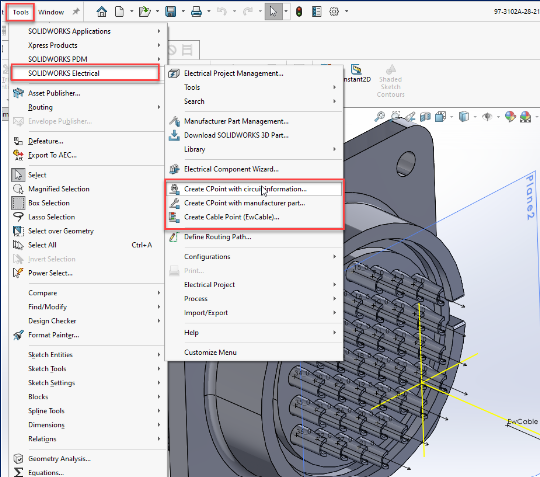
1. Connection Point Shortcut
If you’re setting up a part for routing in 3D, the option to add routing points saves time overloading the Electrical Component Wizard. Also new options to remove Cpoints streamlines changes to your connection point list.
Check out this video
https://help.solidworks.com/2022/english/WhatsNew/c_wn2022_electrical_CPImpovement.h
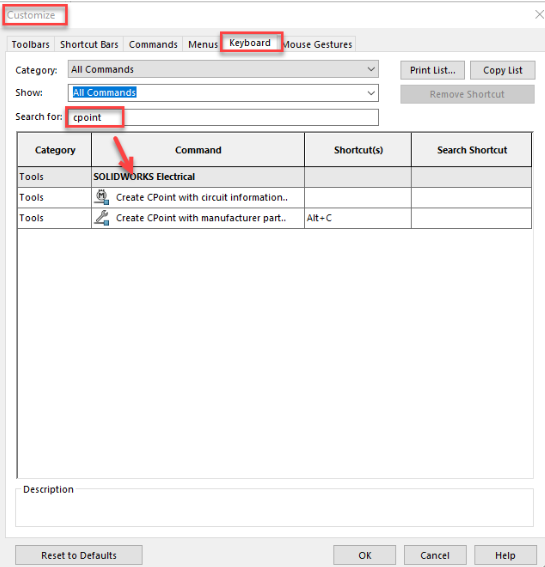
2. Set Keyboard Shortcuts on common Electrical 3D commands
If you are stepping into loads of part/connection point/Wizard work, a reminder that SOLIDWORKS is riddled with time saving keyboard shortcuts and mouse gestures. Electrical users can take advantage of this by visiting the SW Customize window and setting up your favorite commands with keyboard shortcuts. Imagine you’re planning to add connection points (as mentioned in Tip #1) , mapping your keyboard to this repeated task will shorten the mouse travel and menu hunting, saving time as you build up your 3D part’s electrical characteristics!
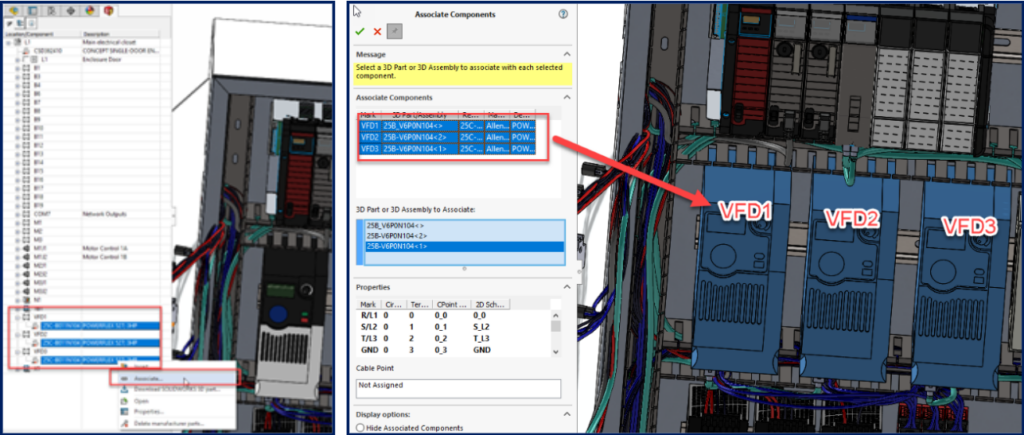
3. Multi-Part Association in 3D
If your mechanical team has already made an assembly in SOLIDWORKS, association may be the preferred method for assigning your Electrical Project component parts to the assembly parts. Save time in this process by selecting and associating several parts.
4. Review Wire Route in 3D
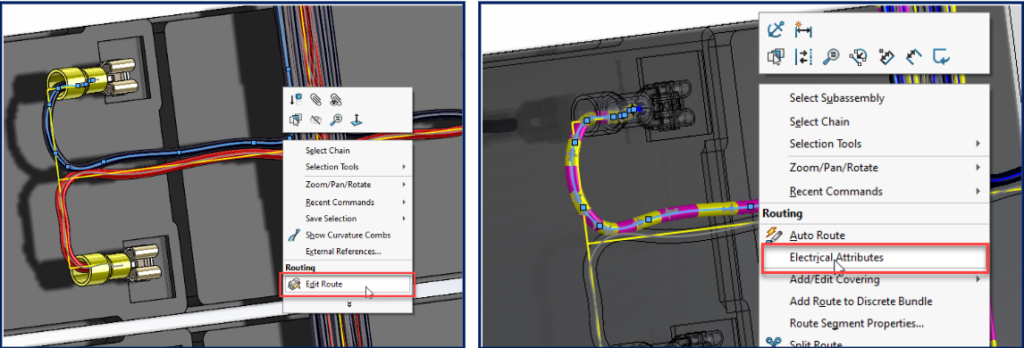
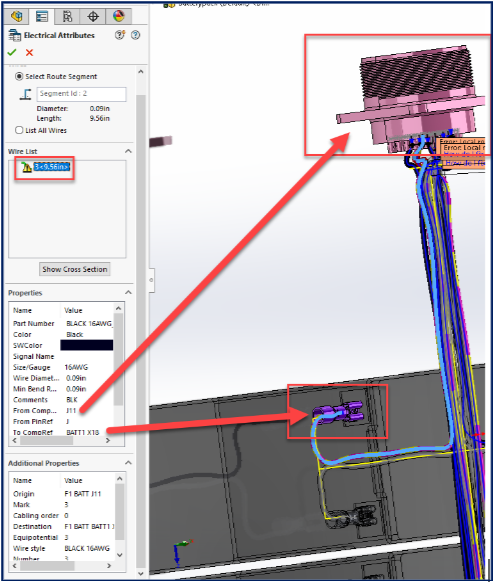
When routing wires, cables or harnesses in 3D, it can help to highlight and visualize the routed trajectory, as well as the background metadata of each route element. This is done by editing route on your target.
When in “edit” mode, then right click again to choose electrical attributes. Review the origin & destination of each wire, check for bend radius indications, while seeing the path highlighted clearly in the assembly. Use this option to ensure it’s following your desired guideline for optimal flow and signal integrity.
5. Create and add Multiple Project Drawings from SOLIDWORKS 3D
With SOLIDWORKS Electrical 3D, it’s simple to create a SOLIDWORKS Drawing (SLDDRW) with the “Create 2D drawing option”.

This feature allows users to easily place views, add dimensions, create marks, and add a BOM and balloons.
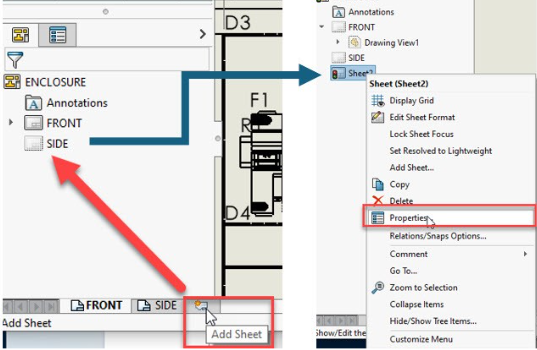
Newer users to SOLIDWORKS may not be aware that you can create multiple drawings when in the drawing creation section. In the lower left of your drawing, add more sheets as shown. Each sheet can be described for your intended use.
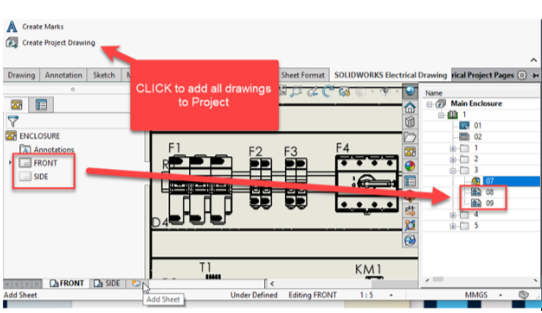
ALL of those drawings can be sent to the Project’s documents. As changes are applied, re-running the command will push the updates to the Project’s drawing list!
Share
Meet the Author

